

In the digital age, capturing a passport-size photo at home is both convenient and cost-effective. With the rise of high-resolution smartphone cameras and advanced editing tools, achieving a professional-quality image no longer requires a visit to a studio. Whether for official documents, visas, job applications, or identification purposes, creating passport photos at home provides both flexibility and savings.
This guide offers a step-by-step approach, detailing the necessary tools, process, and the pros and cons of DIY passport photography. It also explores alternative solutions for individuals seeking extra options, ensuring that you can create a photo that meets the required standards while fitting your needs and preferences.
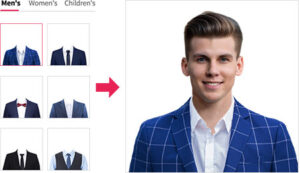
What Does Creating a Passport-Size Picture at Home Involve?
Creating a passport-size photo at home involves using a smartphone or digital camera combined with editing software to produce an image that meets the official specifications for passport and identification photos. This approach enables individuals to capture, edit, and print their own passport-size pictures, eliminating the need for external services.
Read More: New CapCut Pro 2025 Features and Updates
How to Create a Passport-Size Picture at Home
Step 1: Gather the Necessary Equipment
- A smartphone or digital camera with a high-resolution lens.
- A tripod or stable surface to avoid shaky photos.
- A plain white or light-colored background.
- Adequate lighting, preferably natural light.
- A photo editing app or software.
- A printer with high-quality photo paper.
Step 2: Taking the Picture
- Ensure the subject is facing directly toward the camera.
- Maintain a neutral expression with eyes open and mouth closed.
- Keep proper posture and avoid shadows on the face.
- Avoid head coverings unless required for religious or medical reasons.
- Make sure the photo is well-lit, clear, and free of overexposure.
Step 3: Editing the Picture
- Use an online passport photo editor or apps like Photoshop, Adobe Express, or Passport Photo Maker.
- Crop the image to the standard passport size (usually 2×2 inches or 35x45mm, depending on the country).
- Adjust brightness and contrast for clarity.
- Remove any background distractions or color inconsistencies.
- Ensure the image meets the required DPI (usually 300 DPI).
Step 4: Printing the Picture
- Use a high-quality color printer.
- Print on glossy or matte photo paper.
- Cut the printed photo to the required dimensions.
- Verify the final output by comparing it with official passport photo requirements.
Features of Now Create Passport Size Picture in Your Home [Completely Detailing]
| Feature | Description |
|---|---|
| Cost-Effective | Eliminates the need for professional photography services. |
| Convenience | Can be done anytime from the comfort of your home. |
| Control Over Quality | Adjust lighting, background, and clarity as per requirements. |
| Multiple Attempts | No additional cost for retakes if the photo is not perfect. |
| Customizable | Can be edited to fit various official document requirements. |
| Instant Printing | Get the photos immediately without waiting for studio processing. |
Pros of Now Create Passport Size Picture in Your Home
| Pros | Details |
| Saves Money | No need to pay professional photographers. |
| Time-Saving | No travel or waiting times required. |
| Retake as Needed | Can take multiple shots until you get the perfect one. |
| No Hidden Charges | No additional costs for reprints or modifications. |
| Digital Storage | Easily store and use the image for multiple applications. |
Cons of Now Create Passport Size Picture in Your Home
| Cons | Details |
| Quality Variations | May lack professional studio lighting and precision. |
| Printing Costs | Requires a good quality printer and photo paper. |
| Background Issues | Ensuring a plain, shadow-free background can be challenging. |
| Compliance Risks | May not meet strict passport photo regulations in some countries. |
| Equipment Dependency | Requires a good camera and proper editing tools. |
Now Create Passport Size Picture in Your Home Alternatives
| Alternative | Features |
| Professional Photo Studios | Offers guaranteed compliance with passport regulations. |
| Online Passport Photo Services | Websites like ePassportPhoto.com generate passport-ready images. |
| Retail Stores (e.g., Walmart, CVS) | On-the-spot passport photo services. |
| Mobile Passport Photo Apps | Apps like Passport Booth, ID PhotoPrint, and PhotoAiD provide passport photo templates. |
| Government Photo Kiosks | Available at post offices and official passport centers. |
Frequently Asked Questions
What equipment do I need to create a passport-size photo at home?
You will need a smartphone or digital camera with a high-resolution lens, a tripod or stable surface to avoid blurry photos, a plain white or light-colored background, adequate lighting (preferably natural), photo editing software, and a printer with high-quality photo paper.
What are the requirements for a passport-size photo?
A passport-size photo typically requires a plain white or light-colored background, a neutral facial expression with eyes open and mouth closed, the subject facing directly toward the camera, and no shadows on the face. The photo must be well-lit and clear.
What dimensions should the passport-size photo be?
Passport-size photo dimensions usually vary by country. Common sizes include 2×2 inches (51×51 mm) or 35×45 mm. Check your country’s specific requirements to ensure accuracy.
How do I edit the photo to meet official standards?
You can use photo editing apps like Photoshop, Adobe Express, or Passport Photo Maker. Crop the image to the required dimensions, adjust brightness and contrast, remove any background distractions, and ensure the image has the necessary DPI (usually 300 DPI).
Can I use a regular printer to print my passport photo?
Yes, you can use a high-quality color printer. It’s best to print on glossy or matte photo paper to achieve the desired result.
How do I know if my passport photo is acceptable?
Compare the printed photo with official passport photo guidelines for your country, ensuring it meets the size, facial expression, background, and lighting requirements. You can also check online resources or passport photo services to verify if your photo is compliant.
Can I take a passport photo by myself, or do I need help?
While it’s possible to take the photo by yourself using a tripod or stable surface, it may be easier to ask someone else to take the photo for you, ensuring proper framing and alignment.
Conclusion
Creating a passport-size photo at home is a simple and cost-effective process that saves both time and money. By gathering the right equipment, ensuring proper lighting, and following the necessary guidelines, you can easily capture, edit, and print a professional-quality photo without needing to visit a studio.
With the help of editing tools and a bit of attention to detail, your homemade passport photo can meet official standards. Just remember to carefully check the specific requirements for your country to ensure compliance. Whether for passports, visas, or job applications, having the ability to create your own passport-sized pictures at home gives you convenience and flexibility whenever you need them.